

AI Influencer Face Retouching & Consistency Guide (Fix Bad AI Photos in 2025)
Even the best AI images sometimes come out with strange faces, weird eyes, or small details that break the illusion. If you want your AI influencer to look real and premium, you need a simple face retouching and consistency workflow.
This guide shows you how to fix bad AI photos, retouch faces, and keep your AI model looking the same in every image — using a beginner-friendly workflow on desktop or phone.
We’ll use the same principles that power Nyra, the luxury AI businesswoman from hustlewithnyra.com.
🟡 Step 1 — Identify What’s Wrong With the Face
Before you fix anything, you need to know what looks off. The most common AI issues:
- eyes looking in different directions
- too much smoothing / “plastic” skin
- sharp nose but blurry mouth
- asymmetrical eyebrows
- hands near the face looking weird
If the whole image is broken, it’s often faster to generate a new one using the same prompts from your AI photo creation guide. If only parts of the face are wrong, retouching is enough.
🟡 Step 2 — Use Better Base Images (Photoshoot Quality)
Face retouching becomes 10x easier if your base images are already strong. Make sure you:
- use consistent lighting (golden hour, soft studio, or natural)
- keep the same hair style and color
- avoid extreme angles in your prompts
- stay close to your chosen persona aesthetic
If you don’t have a solid library yet, create one by using the AI influencer photoshoot guide and generating 20–30 high-quality shots of the same model.
🟡 Step 3 — Fix Faces With AI Enhancement Apps
For most beginners, the easiest way to repair faces is with enhancement apps (mobile or desktop). Tools like Remini, Lightroom Mobile, or built-in “AI enhance” filters can:
- sharpen eyes and lashes
- smooth skin (lightly)
- fix low-resolution details
- restore texture in hair and lips
Recommended workflow:
- Export your AI photo from Midjourney / DALL·E.
- Run it once through an enhancer (not 3–4 times, or it becomes plastic).
- Zoom in and check eyes, lips, and cheeks.
This step already turns many “almost good” AI faces into post-ready content for your AI content workflow.
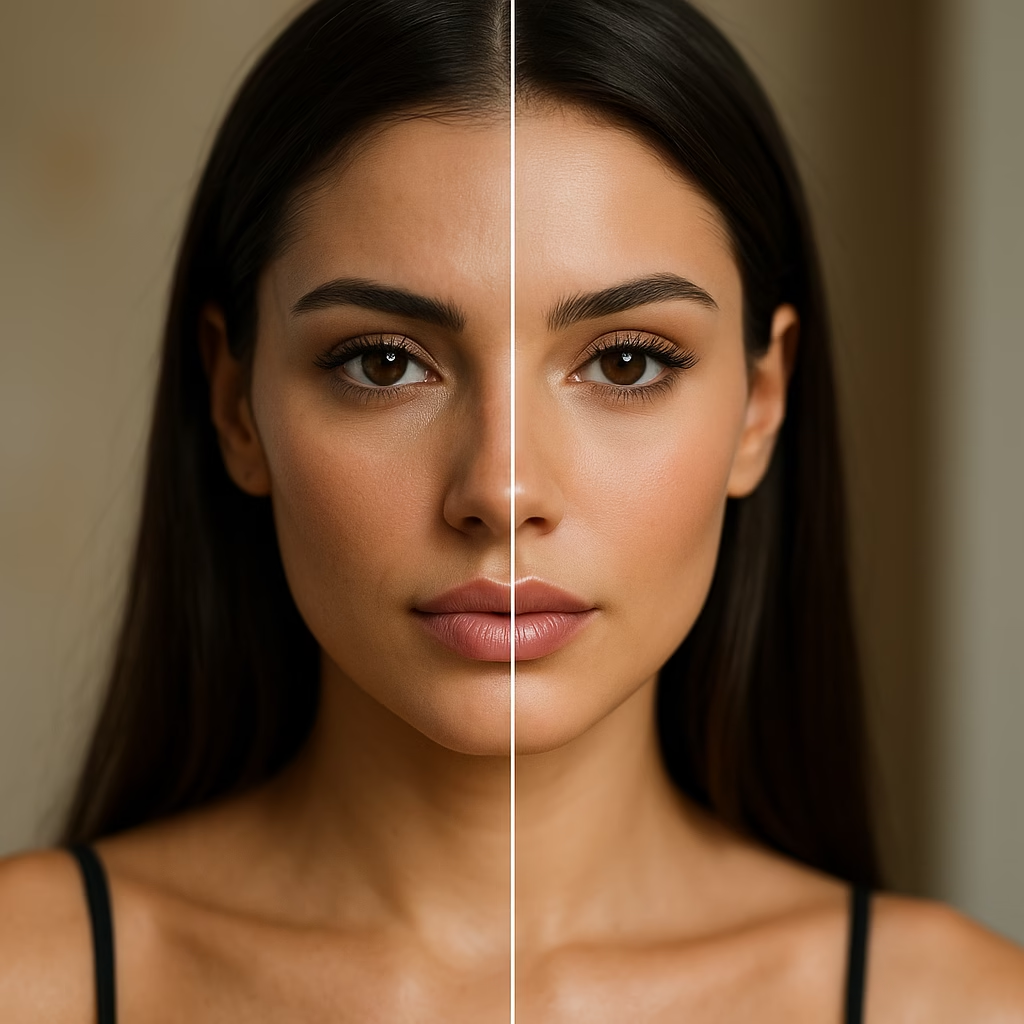
🟡 Step 4 — Correct Over-Smoothing and “Plastic” Skin
AI + enhancement apps can easily over-smooth the skin. To keep a natural, luxury result:
- lower skin smoothing in your app (keep it subtle)
- add a bit of grain for realism
- use clarity only on hair, clothes, and jewelry — not full face
The goal is soft glam, not a wax doll. If you need full luxury mobile settings, use the Luxury AI Influencer Editing Guide (Mobile Only).
🟡 Step 5 — Fix Eyes, Brows, and Lips
Eyes and lips sell the entire AI influencer. If they look off, the whole photo feels fake.
Quick fixes:
- increase sharpness only around the eyes
- adjust brightness/contrast in the eye area
- slightly darken lashes and brows for definition
- add a small bit of saturation to lips (not too much)
Some apps let you retouch specific zones of the face with a brush — use that instead of global filters for a more realistic result.
🟡 Step 6 — Keep the Same Face Across All Photos (Consistency)
Face consistency is crucial if you’re building a real personal brand as an AI creator. If the model looks like a different person in every post, followers and brands won’t connect with her.
To keep the same face:
- Save 2–3 “perfect” reference images of your AI influencer.
- Reuse them inside your prompts (“in the style of this reference face”).
- Stick to the same hair color, style, and length.
- Keep your editing preset the same on every photo.
This is the same method Nyra uses so she always looks like the same luxury businesswoman across TikTok, Instagram, and the 30-day content calendar.
🟡 Step 7 — Match Lighting and Color Across Your Grid
Even if the face is consistent, changing lighting and colors too much will break your brand.
Use a stable editing style:
- one main color palette (beige, gold, white, black, etc.)
- one filter or preset for all content
- similar contrast and temperature across posts
For full aesthetic control, combine this guide with your branding setup from the AI Influencer Branding Guide.
🟡 Step 8 — When to Regenerate Instead of Retouching
Sometimes, it’s smarter to generate a new image instead of trying to fix a broken one for 20 minutes.
Regenerate the image if:
- eyes are completely asymmetrical
- teeth or mouth look distorted
- hands cover the face in a strange way
- background objects merge into facial features
Use the same prompt and workflow from your previous good images. You can find a full photoshoot approach in the AI Influencer Photoshoot Guide.
⭐ Conclusion
Face retouching and consistency are what separate “obvious AI images” from real-looking, luxury AI influencers that brands want to work with.
By using smart enhancement, subtle edits, and a consistent aesthetic, you can fix bad AI photos and make your influencer look like the same person in every post.
If you want professionally edited AI influencer photos, full branding, or done-for-you content packs, visit:
👉 hustlewithnyra.com
⭐ FAQ
Can I do face retouching only on my phone?
Yes. With modern mobile apps, you can fix eyes, skin, and lighting directly from your phone.
How do I stop my AI model from changing every time?
Use consistent prompts, save reference images, and apply the same editing preset on every photo.
Will retouching make my AI influencer look fake?
Only if you overdo it. Keep everything subtle and focus on small corrections instead of heavy filters.